

Creating % Slope Labels in Archicad
May 24, 2023Have you ever wanted to add a % Slope label to your meshes? If so, check out this video tutorial on how to convert degrees to % slope using Expressions!
In this Archicad Tutorial, learn how to generate a slope label that can be applied to beams and roof elements with an output in % slope!
Learning Objectives Covered:
- What Archicad Elements Have Slopes?
- How do you input slope for these elements?
- Slope and Angle Units of Measurement
- Expression Based Properties
- Applying Annotation Beams to Mesh Surfaces
% Slope Overview, and why we need it!
For the a long time, I've wanted the ability to add slope labels in % format to site concrete modeling.
Why?
Well, typically Civil Drawings will be documented using a % slope. Building codes will often reference % slope for compliance, and so it's best to represent the slopes for accessible paths and drainage purposes based on %, not degrees.
In order to label and document our projects using a % slope, we have to do a little work to set this up!
I hope you're not afraid of a little trigonometry, because that is exactly what is needed!
Sloping Elements in Archicad
Design tools with MEASURABLE slopes include Roofs, Beams, and MEP segments likes pipes, ducts and cabling. Morphs, Railings, Shells cannot be measured for slope unfortunately!
With our Roof Tool, we can input our slope based on a ratio (1:12), % slope, or Degrees, but our default parameter for retrieving the slope #Pitch, is only reported in Degrees, or as specified in our project preferences (which does not offer %).

Units Available
You can see here with have Decimal Degrees, Degrees, Minutes Seconds, Gradian and Radian as working unit options.

Our dimension units are the same...
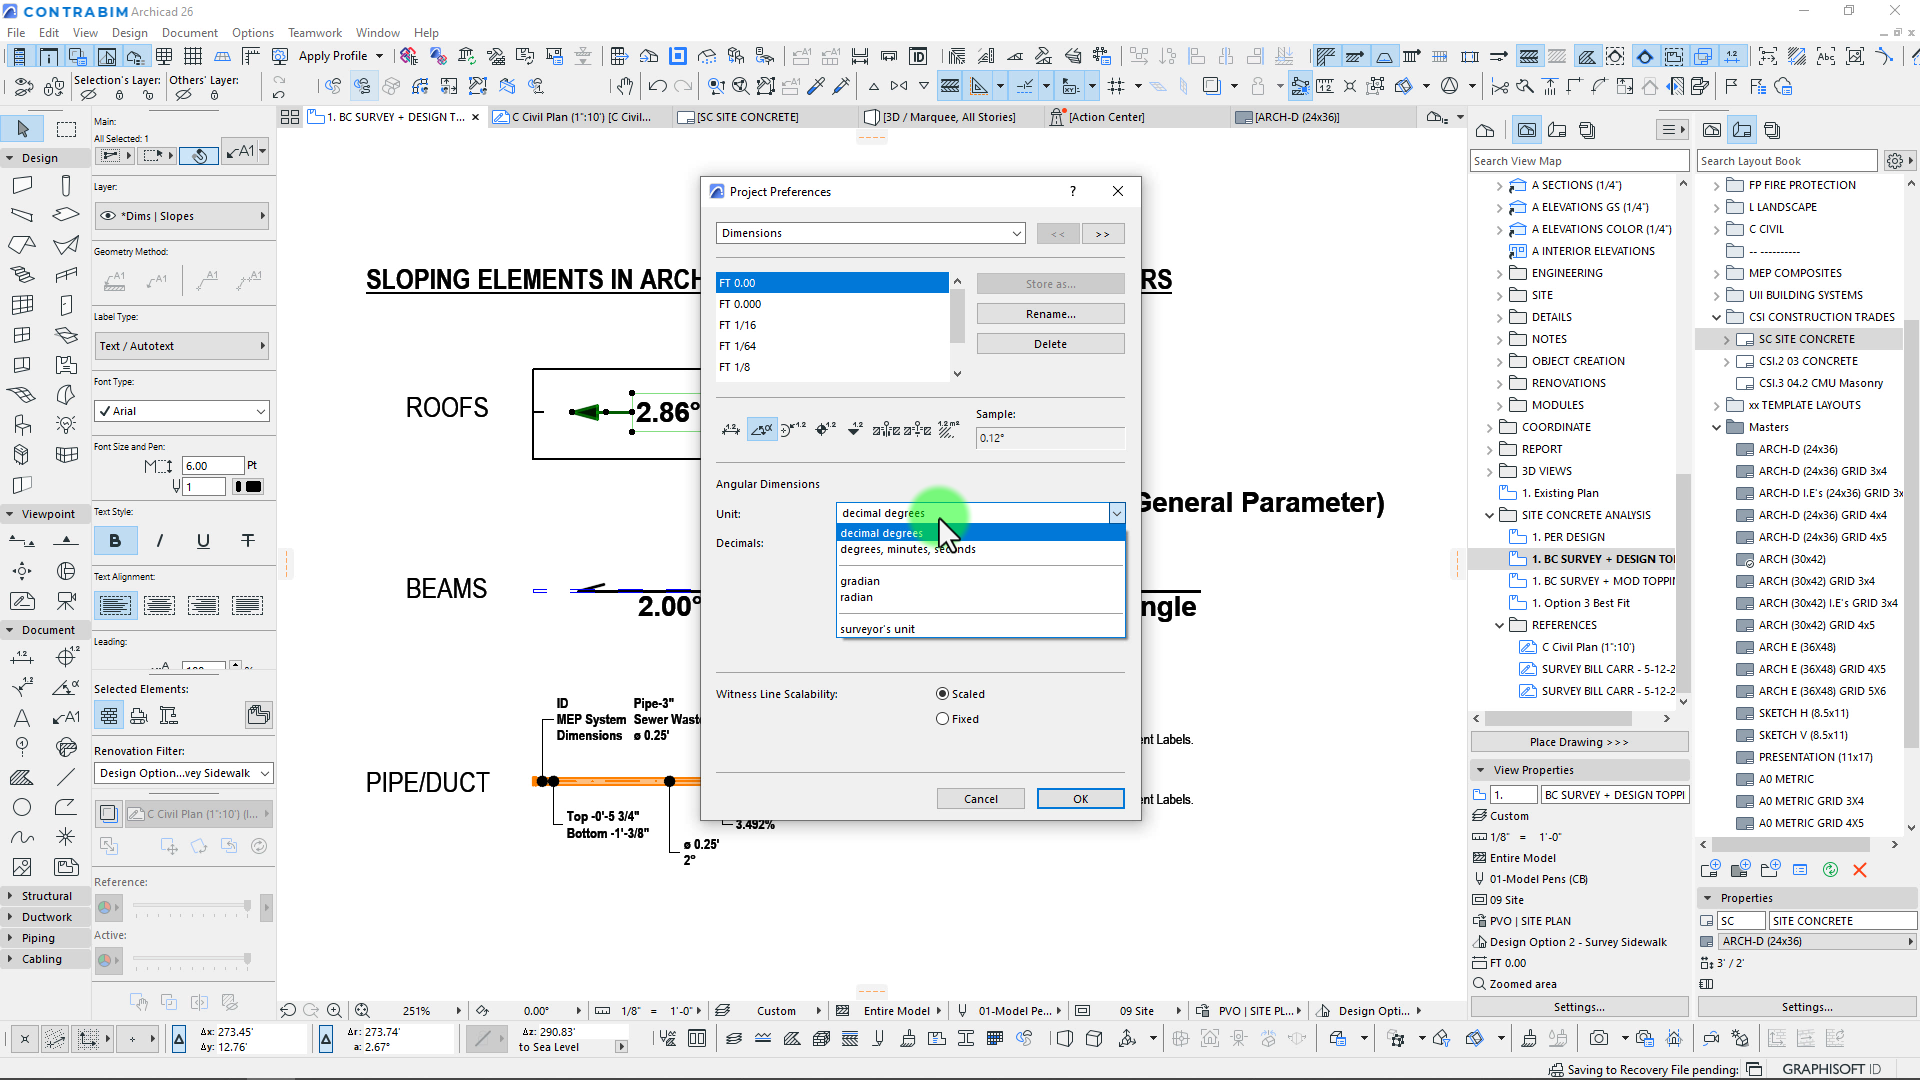
so with this said, we need to do a little work to convert from degrees to %!
Get ready for some TRIG! and the place to do this is within our Properties!
Expression Based Properties
To convert our degree slope to % slope, we need to create 2 properties for ease of use (we could do this with 1, but a much more complicated formula is required).
Our first step is to create a property for Angle Degrees, which pulls multiple element types parameters. Namely PITCH for Roofs, and BEAM SLANT ANGLE for Beams.
By defining our Data Type as an Angle, we can then choose expression, and list multiple options for parameters. This combines multiple element types different data parameters, into one common parameter we can use in the next step!

Step 2, we need to create a % slope property!
Our Data Type here will be a Number, and again we'll use the Expression Option.
To convert our Degrees to %, we need to use this formula.
TAN (Angle Degree) * 100
Pretty simple stuff! In this case, our Angle Degree is the first property we created, which will work for both Roofs and Beams.

So once we've completed this step, we then to make sure both properties are available for the classifications we'll be using the label with. Primarily Roofs and Beams.
We also have a custom classification called Annotations, which we use for this exact type of scenario, when we're modeling elements specifically to help document our project!

Adding Property Values to our Autotext Labels
Once we've completed setting up the properties, we can then simply add them into our autotext labels. As shown here, you can see we have both degrees and % slope included, which can be a nice calculator for feedback!

Applying Slope Labels to MESHES!
Finally, since we have the slope label working properly, we can apply it to a mesh.
PROBLEM! Meshes cannot calculate Slope! ???
So what do we have to do here?
The work around, is to place beams to represent 2 points on a mesh, and based on those specific elevations at those points, we can then calculate the % slope!

Placement in 3D to snap to mesh elevations.

And that pretty well does it!
Tips and Best Practices:
- Setup a beam for annotation purposes only! Exclude it from everything else.
- Set the uncut line type to a long dot, so it appears invisible, resulting in a cleaner documentation output
- Only add the slope annotations, once you know you have the mesh modeled correctly! Avoid rework by placing them too early.
- You could also use the beams as a planning tool, to locate exact slopes of your mesh, before you model your mesh.
If you have any questions, please reply to our YouTube video comments!
To download this RIG and Associated Properties, complete the form below!
Complete this form to download the SLOPE RIG and PROPERTIES!
Note on Import!
How to Load the .MOD into your file.
You can drag and drop this .mod into your Archicad 26 file, but be aware it will add 2 new properties, and 1 new branch under the Archicad v2.0 classification.
It will also bring in new attributes for surfaces, materials as well as the CONTRABIM Model Pen Set.
For this reason, we recommend to load this into an empty file for testing purposes, before bringing into your active project file! That way you can clean and align these changes to your current file settings.
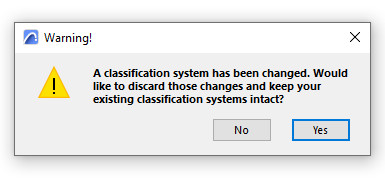
Upon import, you'll receive this notification, which will prompt you to keep or discard the changed classifications.
By clicking Yes, you will discard changes, resulting in a classification that has not been updated (and labels that will not function). By clicking No, you'll receive the new Construction>Annotation branch under v2.0.
Alternatively, you can import just the Properties and Classifications separately, instead of the module, and build up your own labels yourself as demonstrated in the tutorial!

Added Attributes


To avoid adding any attributes to your file, you may opt to import the Properties and Classification XML instead!
Stay connected with news and updates!
Join our mailing list to receive the latest news and updates from our team.
Don't worry, your information will not be shared.
We hate SPAM. We will never sell your information, for any reason.
