
ARCHICAD Tip - Roof Wizard Tool
Apr 17, 2020It's always fun to play around with some of the less known, less used functions and tools in ARCHICAD.
The Roof Creator Tool is one of them.
In this tutorial, learn how to use the Roof Wizard, and the individual Roof Framing Elements to quickly add rafters, hips, valleys, ridges, top plates, blocking and more.
With some quick trial and error, you'll find the features are pretty user friendly, and can produce detailed framing takeoffs.
To access the tools, find them under Design>Roof Extras>Roofmaker

Roof Wizard
The Roof Wizard is the best place to start to get familiarized with the tools. Before you can activate it, you'll need to be in a floorplan view, with a roof selected, or with a marquee around a roof element. Then activate the wizard.
Rafters
The first tab is for Rafters, which are the primary beams that typically will be supporting your roof covering systems.
Select your width, height, eave angle, and distance. These are the main options.
There are some add extra's which can be useful as well.

Adding a soffit will create a an extra framing member based on the overhang setting of the roof element.

Collars and Ties
The second tab is the Collars and Ties, which will be created when rafters are aligned to a shared ridge beam.


Depending which option you toggle, the preview will adjust.
Tip - To set these at a desired elevation, reference the elevation from Project Zero. The "to Story 2" option is more difficult to determine.
Beams
The third tab is where Ridge Beams and Plate Beams can be added.

Toggle the "Beam between rafters" option to set at ridge line, or below.
Plate beams will be created at the top of wall condition.
Blocking
The fourth tab is for blocking/trimmers, which I havn't quite figured out yet. If you do please let me know:)

Hip Rafters
Hip Rafters will create beams along the hips and valleys.

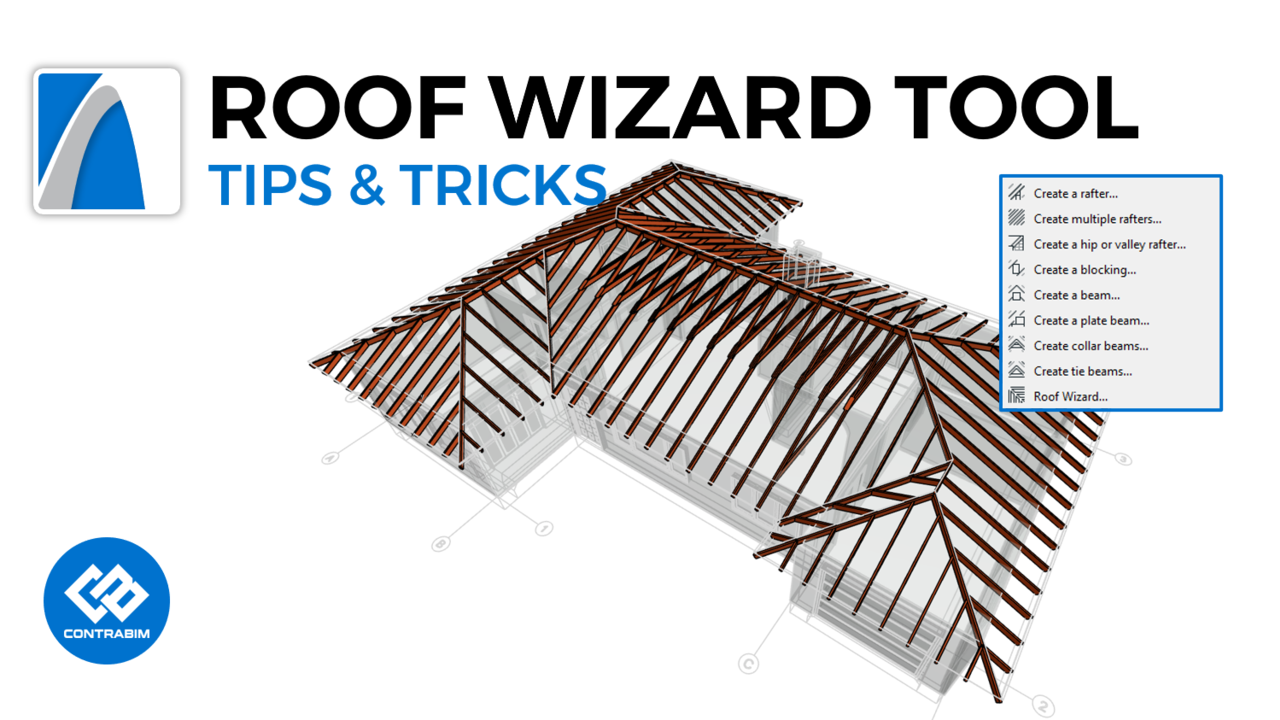
Manual Roof Elements
In addition to the roof wizard, we can also create framing elements using the individual roof tools. This in some cases may be desired, to produce an exact spacing or placement.
The first tool, is the single rafter.
When selecting this option, you'll be prompted to select a single plane roof to apply the rafter to.

The second tool, is the multiple rafters option. This is very useful, and has settings to define equal spacing, or exact spacing with gaps at the start, middle, or end.
Tip!! - This input method can be completed at an angle, to pick up the entire plane.

The next tool, is the Hip / Valley Beam. This can be applied to a sloping hip or valley, but it doesn't appear to work on flat / ridge beams.

TIP - Instead of using the hip/valley beam tool, I'd recommend to use the roof wizard to create hips, valleys & ridge beams at all once. This is much more efficient.

The next option is a purlin beam, which can be placed wherever clicked, either at the top of wall, or mid rafter. This can also be flat, or rotated to the angle of the rafter.

And finally, we have the collar and ties, which work exactly the same. Simple select the rafter you want it to apply collar or ties to, and activate the tool.
TIP - Make sure to set your elevation from project zero!

Also, you'll be prompted if your rafters are not in alignment, in which case you won't be able to generate the collar/ties.
That's about it!
I hope you have fun with this tool, and if you have any questions please let me know!
John
Stay connected with news and updates!
Join our mailing list to receive the latest news and updates from our team.
Don't worry, your information will not be shared.
We hate SPAM. We will never sell your information, for any reason.
